
Last updated on January 25th, 2023 at 11:36 am
This tutorial will help you configure a NAT instance easily and run private instances behind it which is able to connect to the internet for downloading updates and installing packages.
For that in short we will be performing the following steps,
- Create A New VPC
- Create 2 Subnets
- Create 2 Route table
- Create IGW and Attach to VPC
- Launch Amazon Linux Instance
- Configure NAT Instance Using IP Tables
Note: There is a NAT gateway option now available in AWS and you really don’t have to create a NAT instance unless it is absolutely necessary for your use case. Creating NAT instance of your own can have additional overhead of monitoring the instance and you may face scalability issues.
Create A New VPC
Go to https://console.aws.amazon.com/vpc/
Click on Create VPC, and Provide the details. Here I am using the CIDR block as 10.1.0.0/16. You may use your own as per your requirement.
Provide relevant Name Tag and leave all other as default. Hit “Yes, Create” button. The Name I have given for this VPC is “MyNewVPC”

Create 2 Subnets
Go to https://console.aws.amazon.com/vpc/home?region=us-east-1#subnets: (Make sure to change the region accordingly, Here I am using US-EAST-1)
Click on “Create Subnet” and Provide relevant Name Tag I have given as “MyPublicSubnet“,
Select the VPC we have just created and add the IPV4 CIDR block as 10.1.1.0/24. Hit “Yes, Create” button
Now let us click on “Create Subnet” again and provide relavent Name Tag I have given as “MyPrivateSubnet”, Select the VPC we have just created and add the IPV4 CIDR block as 10.1.2.0/24. Hit “Yes, Create” button
At present we have both Private and Public subnet created for our VPC.

Create 2 Route table
Go to https://console.aws.amazon.com/vpc/home?region=us-east-1#routetables: (Make sure to change the region accordingly, Here I am using US-EAST-1)
Click on “Create Route Table” and Provide relevant name and then select the VPC we have created and click on “Yes, Create”.
I have created two routes and named them as “My_Public” and “My_Private“
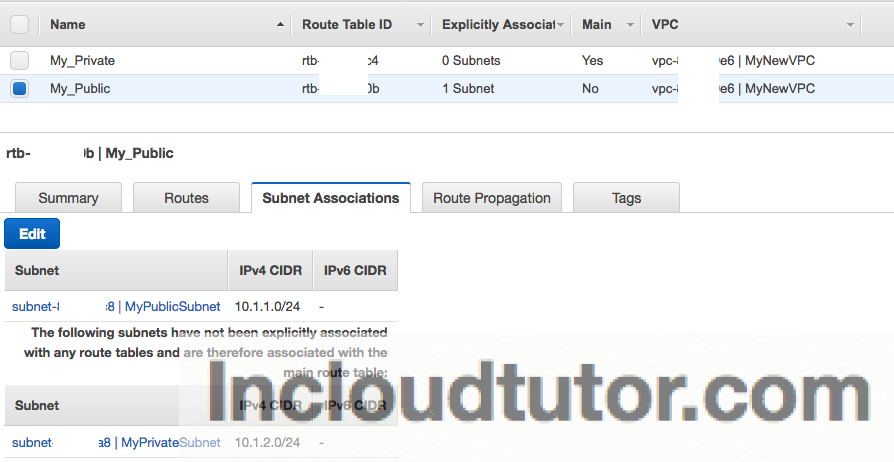
Next step is to modify the Subnets associated with the above route tables we have created. For that go to Subnets > Select “My_Public” > Click on “Subnet Associations” tab and hit EDIT , Select “MyPublicSubnet” and hit Associate.
Do the same for “My_Private” with the Subnet associated as “MyPrivateSubnet”. Screenshot below is only for Public Route table.
Create IGW and Attach to VPC
Go to https://console.aws.amazon.com/vpc/home?region=us-east-1#igws: (Make sure to change the region accordingly, Here I am using US-EAST-1)
Click “Create Internet Gateway”, Name it as “My Own IGW” and hit “Yes, Create”. Once that is done select this IGW you have created and Click on “Attach to VPC” . Select “MyNewVPC”
Modify Route Tables
—————–
The next step is to Modify the Public Route table we have created and add target as the new IGW created in the step above.
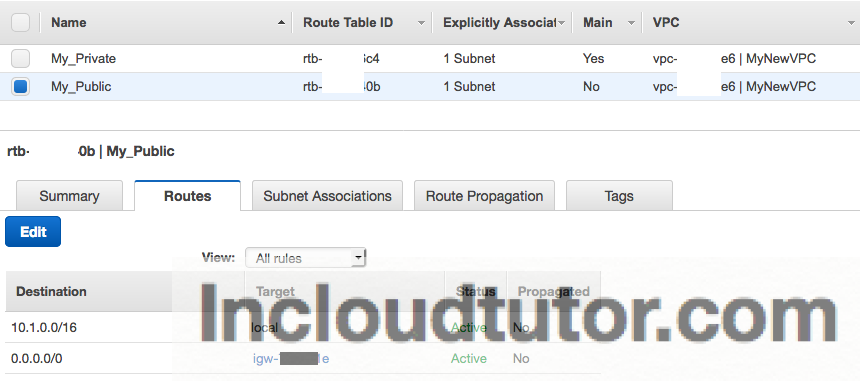
In the VPC console, Click “Route Table”, Select the “My_Public” and hit “Routes” tab. Click EDIT
Add destination as “0.0.0.0/0” and Target as “igw-xxxxxxxx” . This will be the IGW we have attached to the VPC. We are all set now.
Launch Amazon Linux Instance
While launching the instance in Step 3: Configure Instance Details, Make sure to select NETWORK as “MyNewVPC” and Subnet as “MyPublicSubnet”. Auto-assign Public IP option should be Enabled. Leave everything else as default (I have selected Amazon Linux as OS and t2.micro instance type) and Launch instance.
Configure NAT Instance Using IP Tables
1] Login to NAT Instance using SSH
2] Run this command
sudo iptables -A POSTROUTING -t nat -s 10.1.2.0/24 -j MASQUERADE
3] List IP tables to confirm that the rule is added “iptables -L -t nat” , you should see a similar output as shown below
$ sudo iptables -L -t nat
Chain PREROUTING (policy ACCEPT)
target     prot opt source               destination
Chain INPUT (policy ACCEPT)
target     prot opt source               destination
Chain OUTPUT (policy ACCEPT)
target     prot opt source               destination
Chain POSTROUTING (policy ACCEPT)
target     prot opt source               destination
MASQUERADE  all  --  ip-10-1-2-0.ec2.internal/24  anywhere
$
4] Now enable IP forward,
$ sudo bash -c 'echo "1" > /proc/sys/net/ipv4/ip_forward'
$ cat /proc/sys/net/ipv4/ip_forward
1
$
To make IP_FORWARD permanent after Reboot, Please run this command
“sudo sysctl -w net.ipv4.ip_forward=1″
5] Disable source and destination check on this NAT instance from the AWS console. Go To Instances
Select the NAT instance your have created > Under ACTIONS > NETWORKING click on “Change Source/Dest. Check” and disable it. More information can be found here
6] Let us now change the Route table for private route “My_Private” and add this NAT instance as the destination for 0.0.0.0/0
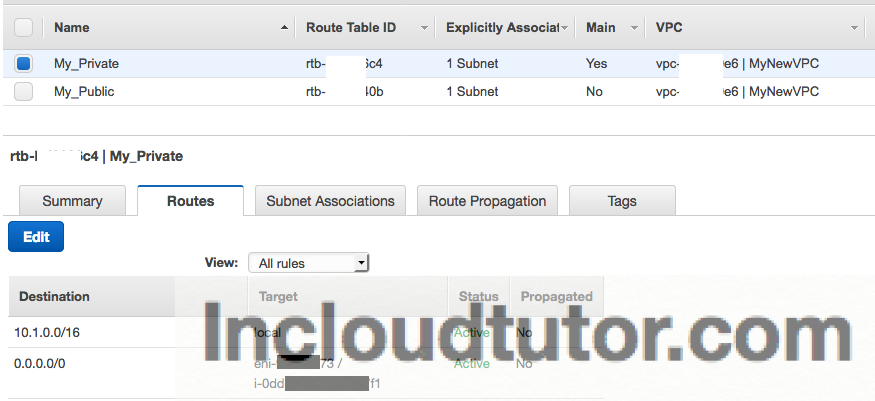
You are all set with NAT instance now. If you are seeing “Black Hole” as the status check whether the NAT instance is up and running and configured correctly.
Let us launch a private instance and try to connect to it through the NAT instance you have created. You may need to use AGENT Forwarding make sure you allow agent forwarding or Copy the Keypair to the NAT instance and then connect to the private instance using that key which is not always a good practice.
NOTE: You may need to Edit the Security Group of the NAT Instance and Allow HTTP / HTTPS from the Source for example here private subnet CIDR 10.1.2.0/24 or the private instances Security Group.
Then run “yum install telnet” to check whether the private instance is able to connect to internet.
Make sure you launch a private instance Under NEW VPC which we have created and with Private Subnet selected.