
Last updated on May 10th, 2024 at 08:48 am
In this guide I will walk you through 6 simple steps of configuring Let’s Encrypt SSL certificate in Apache running on AWS Amazon Linux 2. I am going to use one of my domains named devopsfaktory.com as an example to show you in real world how it looks to configure from scratch.
Table of Contents
- Step 1 – Install CertBot
- Step 2 – Install Apache Plugin
- Step 3 – Configure Virtual Host
- Step 4 – Request Certificate
- Step 5 – Update SSL certificate path
- Step 6 – Restart Apache / Test Website
Step 1 – Install CertBot
In order to install CertBot, we have to enable EPEL repo in Amazon Linux 2. Lets get started
$sudo amazon-linux-extras install epel
Once EPEL is installed and enabled, just use yum to install CertBot
$sudo yum install certbot
Step 2 – Install Apache Plugin
Once CertBot is installed, the last command you have to run is to install the Apache plugin for CertBot
$sudo yum install python-certbot-apache
List the plugins installed using the certbot command to make sure that you have Apache Web Server plugin displayed
$sudo certbot plugins
Saving debug log to /var/log/letsencrypt/letsencrypt.log

- - - - - - - - - - - - - - - - - - - - - - - - - - - - - - - - - - - - - - - -
* apache
Description: Apache Web Server plugin
Interfaces: IAuthenticator, IInstaller, IPlugin
Entry point: apache = certbot_apache._internal.entrypoint:ENTRYPOINT

* standalone
Description: Spin up a temporary webserver
Interfaces: IAuthenticator, IPlugin
Entry point: standalone = certbot._internal.plugins.standalone:Authenticator

* webroot
Description: Place files in webroot directory
Interfaces: IAuthenticator, IPlugin
Entry point: webroot = certbot._internal.plugins.webroot:Authenticator
Step 3 – Configure Virtual Host
Before we request for an SSL cert from Lets Encrypt, we need to make sure that Apache configuration has required VirtualHost directives (if not already done)
Since we are using devopsfaktory.com as the test domain, I have created a configuration file under /etc/httpd/conf.d with the name devopsfaktory.com.conf
conf.d]# cat devopsfaktory.com.conf
<VirtualHost *:80>
    ServerName devopsfaktory.com
    DocumentRoot /var/www/html
    ServerAlias www.devopsfaktory.com
    ErrorLog /var/www/error.log
    CustomLog /var/www/requests.log combined
</VirtualHost>
As you can see above I have devopsfaktory.com as ServerName and also added ServerAlias as www.devopsfaktory.com
Step 4 – Request Certificate
Once the configuration looks good, next step is to request SSL certificate via CertBot
# certbot certonly --apache
   Saving debug log to /var/log/letsencrypt/letsencrypt.log
   Plugins selected: Authenticator apache, Installer apache

   Which names would you like to activate HTTPS for?
   - - - - - - - - - - - - - - - - - - - - - - - - - - - - - - - - - - - - - - - -
   1: devopsfaktory.com
   2: www.devopsfaktory.com
   - - - - - - - - - - - - - - - - - - - - - - - - - - - - - - - - - - - - - - - -
   Select the appropriate numbers separated by commas and/or spaces, or leave input
   blank to select all options shown (Enter 'c' to cancel): 1
   Requesting a certificate for devopsfaktory.com
   Performing the following challenges:
   http-01 challenge for devopsfaktory.com
   Waiting for verification...
   Cleaning up challenges

   IMPORTANT NOTES:
    - Congratulations! Your certificate and chain have been saved at:
      /etc/letsencrypt/live/devopsfaktory.com/fullchain.pem
      Your key file has been saved at:
      /etc/letsencrypt/live/devopsfaktory.com/privkey.pem
      Your certificate will expire on 2023-03-30. To obtain a new or
      tweaked version of this certificate in the future, simply run
      certbot again. To non-interactively renew *all* of your
      certificates, run "certbot renew"
    - If you like Certbot, please consider supporting our work by:

      Donating to ISRG / Let's Encrypt:   https://letsencrypt.org/donate
      Donating to EFF:                    https://eff.org/donate-le
Since I have two names devopsfaktory.com as ServerName and ServerAlias as www.devopsfaktory.com it prompted me for installing certificate for both but I selected only devopsfaktory.com since this is an example.
You can also use certbot –apache instead of the command I used above, but this command will automatically try to update the configuration file. This is not a great approach in my opinion. It is always good to know which configurations got updated so that in case if we face any issues it will be easy to revert back to original configuration.
My SSL certificates are located in
Certificate and chain :
/etc/letsencrypt/live/devopsfaktory.com/fullchain.pem
Key file:
/etc/letsencrypt/live/devopsfaktory.com/privkey.pem
Certificate expire on 2023-03-30
Step 5 – Update SSL certificate path
Next we have to update the SSL file location along with adding VirtualHost for 443. If you already have the VirtualHost block just update the SSLCertificateFile and SSLCertificateKeyFile directives. It is recommended not to change the path of these certificates as the CertBot daemon keeps tracking of these files.
My configuration for VirtualHost looks like this.
<VirtualHost *:80>
    ServerName devopsfaktory.com
    DocumentRoot /var/www/html
    ServerAlias www.devopsfaktory.com
    ErrorLog /var/www/error.log
    CustomLog /var/www/requests.log combined
</VirtualHost>

<VirtualHost *:443>
    ServerName devopsfaktory.com
    DocumentRoot /var/www/html
    ErrorLog /var/www/error.log
    CustomLog /var/www/requests.log combined
    SSLEngine on
    SSLCertificateFile /etc/letsencrypt/live/devopsfaktory.com/fullchain.pem
    SSLCertificateKeyFile /etc/letsencrypt/live/devopsfaktory.com/privkey.pem
</VirtualHost>
Step 6 – Restart Apache / Test Website
Wow you are all set, we are pending with just restarting/reloading Apache and Testing if everything is working.
$ sudo systemctl restart httpd
$ curl -I https://devopsfaktory.com
HTTP/1.1 200 OK
Date: Fri, 30 Dec 2022 19:26:56 GMT
Server: Apache/2.4.54 () OpenSSL/1.0.2k-fips
Upgrade: h2,h2c
Connection: Upgrade
Last-Modified: Fri, 30 Dec 2022 19:19:35 GMT
ETag: "f-5f1107b656fb2"
Accept-Ranges: bytes
Content-Length: 15
Content-Type: text/html; charset=UTF-8
As you can see I got a 200 OK response for HTTPS request. That is a good sign. Now let us check the browser and see what it shows
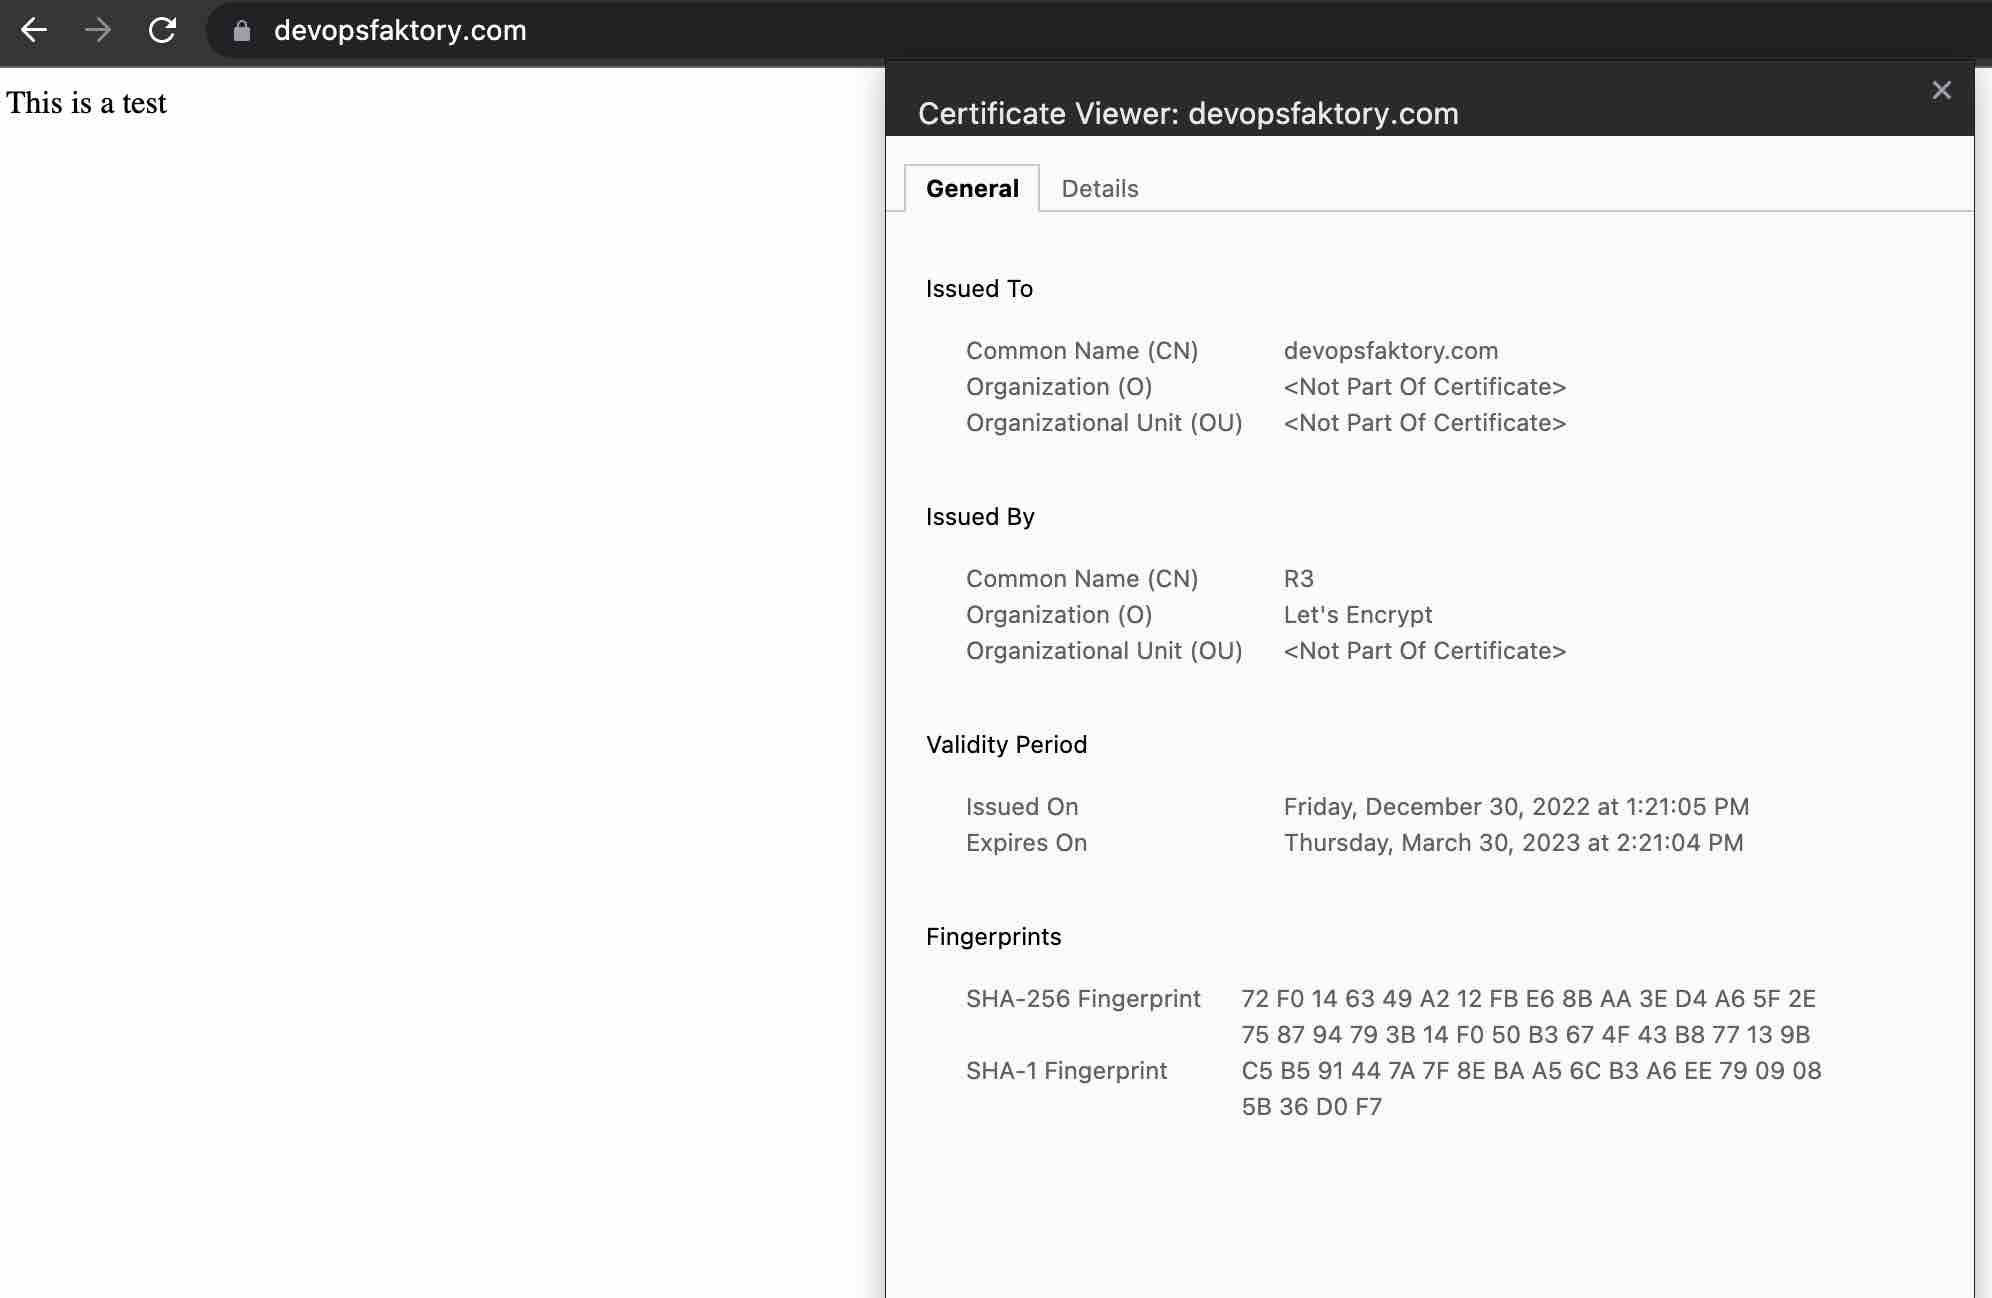
As you can see the certificate details from my browser shows all the information regarding the certificate with the padlock icon, this means we have successfully configured Apache to serve https request.
Some closing notes, since this is AWS make sure that security group assigned to the instance is opened to 443/80.
Make sure that the domain resolve to the IP address of the instance. This means that A record should be pointing to the IP address of the instance otherwise you will see error similar to
Domain: devopsfaktory.com
   Type:   unauthorized
   Detail: 12.xx.xx.51: Invalid response from
   http://devopsfaktory.com/.well-known/acme-challenge/6pQJq6uaT33IVsR1T-Edxg1bPkyvNbhP5dqiGqSIrow:
   403

   To fix these errors, please make sure that your domain name was
   entered correctly and the DNS A/AAAA record(s) for that domain
   contain(s) the right IP address.
If you would like to obtain a new or tweaked version of this certificate in the future, simply run certbot again. To non-interactively renew *all* of your certificates, run “certbot renew“
Reference
https://eff-certbot.readthedocs.io/en/stable/
https://certbot.eff.org/instructions?ws=other&os=windows