Last updated on January 11th, 2023 at 02:27 pm
Enable authentication for PHPMyAdmin is the next big step you need to take once you have installed XAMPP, LAMP , WAMP or PHP application with Nginx.
I am doing the below steps on Ubuntu. Same can be followed in RedHat/CentOS/Amazon Linux etc.,
Table of Contents
Note: You may also follow the same steps in Windows as this is all changed on the PHPMyAdmin application level so all configuration should be standard.
Download PHPMyAdmin
Here I am downloading the latest phpMyAdmin-5.1.2 . Go to https://www.phpmyadmin.net/downloads/ and download the file.
Extract (gunzip/untar) the file under your document root /var/www/html or any location you use as a root directory(your choice).
Once extracted you will get a folder name similar to phpMyAdmin-x.x.x-english, since I downloaded version 5.1.2 my folder name is phpMyAdmin-5.1.2-english. Make sure to rename this default folder to something else.
Tip: Don’t name folder phpMyAdmin-5.1.2-english to phpmyadmin or PHPMyAdmin etc., because these are obvious and you might easily get attacked from external bots/hackers. Name it to something that cannot be easily guessed .
Login Page
Very first step you need to do is find the config.inc.php file located inside the phpmyadmin or the custom directory you just created. Take a backup of this file before proceeding(if you already have one.).
There is also a chance the folder is missing config.inc.php file. If that is the case you just have to do the step below to create config.inc.php. There will be a file named config.sample.inc.php, just issue
cp config.sample.inc.php config.inc.php
TIP: By default $cfg[‘Servers’][$i][‘AllowNoPassword’] is set to false. This will prevent any logins without password. Great security feature.
1) Change auth_type=’cookie’
$cfg['Servers'][$i]['auth_type'] = 'cookie';
So now your config file will look like this
/* Authentication type and info */
$cfg['Servers'][$i]['auth_type'] = 'cookie';
$cfg['Servers'][$i]['extension'] = 'mysqli';
$cfg['Servers'][$i]['AllowNoPassword'] = false;
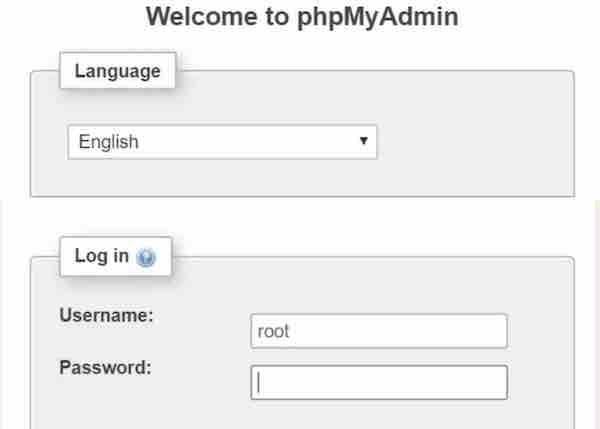
Go to URL http://localhost/phpmyadmin/, you will be seeing a login screen.
You can provide any MySQL User / Password that is already in the MySQL server in the login screen (starting with user root or any other custom user/password you use for your application to connect to MySQL)
If you have a user already set up then provide that username and password in the login screen. This should take you to the PHPMyAdmin homepage.
Enable AutoLogin
If you would like to autologin to PHPMyAdmin without any authentication then what you can do is update the configuration file with these information
/* Authentication type and info */
$cfg['Servers'][$i]['auth_type'] = 'config';
$cfg['Servers'][$i]['user'] = 'anymysqluser';
$cfg['Servers'][$i]['password'] = 'yourpassword';
$cfg['Servers'][$i]['extension'] = 'mysqli';
$cfg['Servers'][$i]['AllowNoPassword'] = false;
As you can see I have changed the auth_type to config and also added 2 more parameters for user and password.
Provide your MySQL User / Password that is already in the MySQL server, this enables the autologin when the auth_type is config.
Note: This is not a great setting and be sure that you are enabling this auto login only for localhost/127.0.0.1 user (within the same network) by adding this condition. Not a secure choice.
if ($_SERVER['REMOTE_ADDR'] === '127.0.0.1') {
    $cfg['Servers'][$i]['auth_type'] = 'config';
    $cfg['Servers'][$i]['user'] = 'root';
    $cfg['Servers'][$i]['password'] = 'yourpassword';
} else {
    $cfg['Servers'][$i]['auth_type'] = 'cookie';
}
More details https://docs.phpmyadmin.net/en/latest/config.html
Go to URL http://localhost/phpmyadmin/, you will be taken directly to the database details.
Make sure that the AllowNoPassword configuration is false.
$cfg['Servers'][$i]['AllowNoPassword'] = false;
Save the file !!
You can make it more secure by changing this value in the config.inc.php file
$cfg['blowfish_secret'] = 'xampp'; /* YOU SHOULD CHANGE THIS FOR A MORE SECURE COOKIE AUTH! */
Two-Factor Authentication
Enable Two-factor authentication by going to Settings inside phpmyadmin.
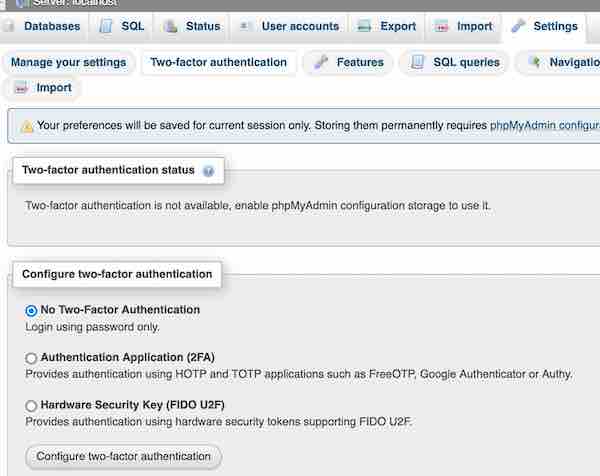
By default it is set to No as you can see from the screenshot above. Change the type of authentication hardware or software accordingly and click on Configure button.