Last updated on March 31st, 2022 at 09:17 am
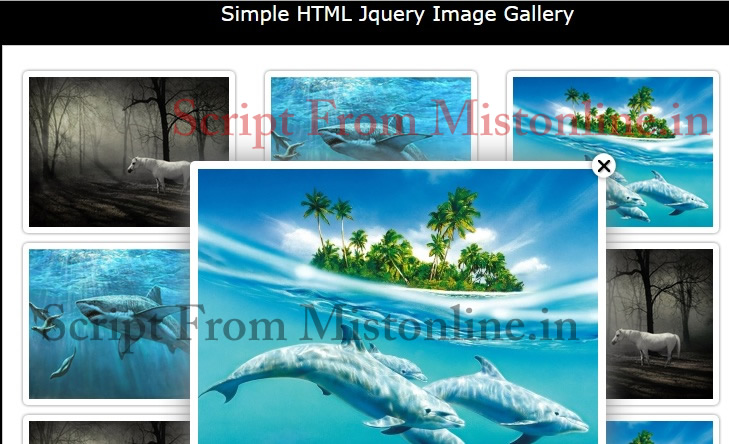
This is a very simple image gallery with thumbnails using HTML. I have added some jquery so that we can incorporate some effect while users click on each thumbnails. The image pop up to the center of the screen when user click on them. Position of the image can be changed easily by changing the 52nd line [‘top’:160] in gallery.js script.
First step is to create a simple HTML based image gallery page.
<div id="main">
<p>
<ul class="thumbs">
    <li>
        <a href="img1.jpg"  rel="slide"  rel="slide"  class="image_gall" title="Big image 1">
            <img width="200" src="img1.jpg"  />
        </a>
    </li>
    <li>
        <a href="img2.jpg"   rel="slide"  class="image_gall" title="Big image 2">
            <img width="200" src="img2.jpg"  />
        </a>
    </li>
    <li>
        <a href="img3.jpg"   rel="slide"  class="image_gall" title="Big image 3">
            <img width="200" src="img3.jpg"  />
        </a>
    </li>
    </ul>
    <p>
    <ul class="thumbs">
    <li>
        <a href="img1.jpg"  rel="slide"  rel="slide"  class="image_gall" title="Big image 1">
            <img width="200" src="img1.jpg"  />
        </a>
    </li>
    <li>
        <a href="img2.jpg"   rel="slide"  class="image_gall" title="Big image 2">
            <img width="200" src="img2.jpg"  />
        </a>
    </li>
    <li>
        <a href="img3.jpg"   rel="slide"  class="image_gall" title="Big image 3">
            <img width="200" src="img3.jpg"  />
        </a>
    </li>
    </ul>
<div style="clear:both;"></div>
<div id="cache"></div>
<div class="close"></div>
</div>
Clear:both property means no floating elements allowed on either the left or the right side.
Next step is to add some style to the HTML image gallery.
<style type="text/css">
body{margin:0;padding:0; font-family:Verdana; font-size:14px;background-color:#000}
a{text-decoration:none; outline:none;}
ul,ol,li,img,p{
    margin:0;padding:0;
    list-style-type:none;
    border:none;
    }
#main{
    margin:20px auto 50px auto;
    padding:20px;
    width:750px;
    background:#fff;
    border:1px solid #ccc;
}
ul.thumbs,ul.thumbs li{float:left;}
a.image_gall{
     margin:5px 30px 5px 0;
    border:4px solid #fff;
    background:#fff;
    display:block;
    padding:2px;
    -webkit-border-radius: 5px;
    -moz-border-radius: 5px;
    border-radius: 5px;
    -moz-box-shadow: 0 0 5px #888;
    -webkit-box-shadow: 0 0 5px #888;
    box-shadow: 0 0 5px #888;
}
h1{font-size:26px; font-weight:normal;}
h2{font-size:20px; font-weight:normal;}
#cache img{
    border:4px solid #fff;
    background:#fff;
    display:block;
    padding:4px;
    position:absolute;
    top:0;
    cursor:pointer;
    left:0;
    z-index:8;
    -webkit-border-radius: 5px;
    -moz-border-radius: 5px;
    border-radius: 5px;
    -moz-box-shadow: 0 0 45px #888;
    -webkit-box-shadow: 0 0 45px #888;
    box-shadow: 0 0 45px #888;
}
.close{
    background:url(close.png) center no-repeat;
    position:absolute;
    height:40px;
    width:40px;
    z-index:20;
    cursor:pointer;
}
</style>
Now the basic elements of the image gallery is complete. If you test your page you will see simple HTML based gallery with no effects.
To add effects we need to include some jquery / javascript tricks like this
<script src="http://ajax.googleapis.com/ajax/libs/jquery/1.11.1/jquery.min.js"></script>
<script type="text/javascript" src="gallery.js"></script>
Please download gallery.js file HERE, This code is well commented so that you are good to modify them according to your need.
In the gallery.js script there is a section which takes care of fade effect. Tweak it according to your requirement
$('.close,.cached').bind('click',function(a){
			$('.close').hide();
			a.preventDefault();
			$('.cached').fadeOut(400);
This code determines the animation which start from the thumbnail after user click them.
$('#cache .'+this_id).css({'left':position.left, 'top':position.top,'height':h,'width':w});
		$('.cached').hide();
		$('#cache .'+this_id).show().fadeTo(0,0.9);
The div with id cache has all the image links cached.

Complete Gallery script
<script src="http://ajax.googleapis.com/ajax/libs/jquery/1.11.1/jquery.min.js"></script>
<script type="text/javascript" src="gallery.js"></script>
<style type="text/css">
body{margin:0;padding:0; font-family:Verdana; font-size:14px;background-color:#000}
a{text-decoration:none; outline:none;}
ul,ol,li,img,p{
    margin:0;padding:0;
    list-style-type:none;
    border:none;
    }
#main{
    margin:20px auto 50px auto;
    padding:20px;
    width:750px;
    background:#fff;
    border:1px solid #ccc;
}
ul.thumbs,ul.thumbs li{float:left;}
a.image_gall{
     margin:5px 30px 5px 0;
    border:4px solid #fff;
    background:#fff;
    display:block;
    padding:2px;
    -webkit-border-radius: 5px;
    -moz-border-radius: 5px;
    border-radius: 5px;
    -moz-box-shadow: 0 0 5px #888;
    -webkit-box-shadow: 0 0 5px #888;
    box-shadow: 0 0 5px #888;
}
h1{font-size:26px; font-weight:normal;}
h2{font-size:20px; font-weight:normal;}
#cache img{
    border:4px solid #fff;
    background:#fff;
    display:block;
    padding:4px;
    position:absolute;
    top:0;
    cursor:pointer;
    left:0;
    z-index:8;
    -webkit-border-radius: 5px;
    -moz-border-radius: 5px;
    border-radius: 5px;
    -moz-box-shadow: 0 0 45px #888;
    -webkit-box-shadow: 0 0 45px #888;
    box-shadow: 0 0 45px #888;
}
.close{
    background:url(close.png) center no-repeat;
    position:absolute;
    height:40px;
    width:40px;
    z-index:20;
    cursor:pointer;
}
</style>
<div id="main">
<p>
<ul class="thumbs">
    <li>
        <a href="img1.jpg"  rel="slide"  rel="slide"  class="image_gall" title="Big image 1">
            <img width="200" src="img1.jpg"  />
        </a>
    </li>
    <li>
        <a href="img2.jpg"   rel="slide"  class="image_gall" title="Big image 2">
            <img width="200" src="img2.jpg"  />
        </a>
    </li>
    <li>
        <a href="img3.jpg"   rel="slide"  class="image_gall" title="Big image 3">
            <img width="200" src="img3.jpg"  />
        </a>
    </li>
    </ul>
<p>
<ul class="thumbs">
    <li>
        <a href="img1.jpg"  rel="slide"  rel="slide"  class="image_gall" title="Big image 1">
            <img width="200" src="img1.jpg"  />
        </a>
    </li>
    <li>
        <a href="img2.jpg"   rel="slide"  class="image_gall" title="Big image 2">
            <img width="200" src="img2.jpg"  />
        </a>
    </li>
    <li>
        <a href="img3.jpg"   rel="slide"  class="image_gall" title="Big image 3">
            <img width="200" src="img3.jpg"  />
        </a>
    </li>
    </ul>
    <p>
    <ul class="thumbs">
    <li>
        <a href="img1.jpg"  rel="slide"  rel="slide"  class="image_gall" title="Big image 1">
            <img width="200" src="img1.jpg"  />
        </a>
    </li>
    <li>
        <a href="img2.jpg"   rel="slide"  class="image_gall" title="Big image 2">
            <img width="200" src="img2.jpg"  />
        </a>
    </li>
    <li>
        <a href="img3.jpg"   rel="slide"  class="image_gall" title="Big image 3">
            <img width="200" src="img3.jpg"  />
        </a>
    </li>
    </ul>
<div style="clear:both;"></div>
<div id="cache"></div>
<div class="close"></div>
</div>
Please don’t forget to change the image file names accordingly.
You can also check these interesting script
Replacing Images With Time Intervals Using Jquery
Simple Image Slideshow
Make sure you have a close.png file in the same path where you call this script.
Tested in Mozilla Firefox & Chrome. Not Sure About IE 🙂